1860s Corded Sunbonnet
Inspiration: I made a slat bonnet a while ago…and never wore it. I don’t like feeling like a mailbox. I drew up my pattern from the Duchess Martin bonnet (I’ll link to a picture when I come across it again 😉 )
Materials: Cotton batiste, “Sugar and Cream” cotton yarn (cording), muslin for the brim lining, homemade starch, narrow tape for ties
Construction: I did all of this by hand. Yes, I know I’m crazy. All those little lines in the brim are hand-stitched channels with cording threaded through them. The crown is gathered on a cord to fit the brim, and the curtain is gathered the same way to fit the lower edge of the crown. That cord is adjustable. Making and applying the starch deserves it’s own post (if anyone’s interested, that is).
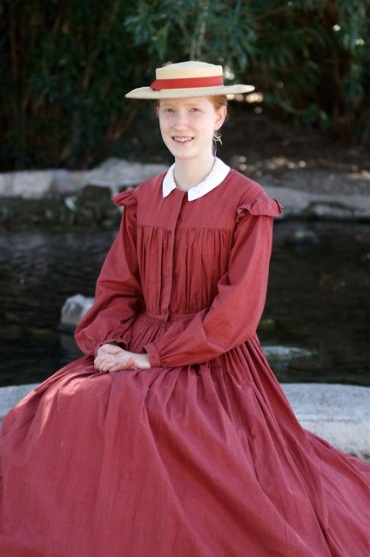
My first 1860s (Civil War) dress

Inspiration: After much research, much of which stemmed from Elizabeth Stewart Clark’s websites, I decided to create this cotton “workdress”. I don’t remember anything specifically that inspired the design of this dress except that I liked these sleeves.
Materials: Martha McCain’s Simplicity pattern 4551 (discontinued). I liked the pattern well enough. It wasn’t the correct size, so it took a lot of fiddling with, but I wouldn’t have known where to start as far as drafting/draping a pattern because the “base” that was used back then is quite different than the one we use today. The fabric is 100% cotton “quilting fabric” from SAS fabrics. Many people really love this place. I don’t. I won’t go into it here, but comment if you want me to elaborate.
Construction: After getting the pattern to fit, I set about adjusting it to look the way I wanted (specifically, not like the pattern cover as this pattern is used a lot in the reenacting circles). I decided to make a yoke because it was a way to make the bodice “younger” without having it look childish. Having a front opening and making it the length I did made it rather adult styled, so I needed something… I also wanted to try some flat pattern manipulation, and this was a simple way to do it. The whole bodice is slat-lined with muslin.

On the left in the above picture is my basic fitted bodice. This is what the lining looks like, and what I was going to use when I was short on time. On the right is how my bodice looks now. When I found out that I didn’t have to rush, I decided to change my fitted bodice into a yoked bodice. It was quite simple, all I did was cut on the white horizontal line, cutting off the part I wanted to be fuller, forming a yoke style line. Then I cut the lower piece into strips and spread them out parallel to each other on a large piece of paper to make a pattern for the full part. I just used that pattern to cut out the fabric, gathered it to fit and sewed it on!
I believe I took the advice of some others who have made this pattern and took out some of the fullness in the bishop sleeves (it can be a bit much when using stiffer fabric). The sleeve heads are unlined, I just whipped a very narrow rolled hem.
The skirt is gauged, and I discovered in doing so that I love gauging! I know I’m strange… It does take a long time, but so do the other methods, really. I used four panels of 45″ wide fabric which makes for a 180″ skirt that needed to be condensed to my 23″ waist. Gauging was a very effective way to do that. I faced the hem of the skirt and hemmed it by hand.
Most of the sewing was done on the machine, but I did some by hand (gauging, hemming, finishing, etc.).

This picture was taken in downtown Tucson at the historic “Z mansion” shortly after I finished the dress and apron (and before I had a hoop!).
In case I missed anything, here is the review I posted on the Pattern Review site:
Pattern Description:
This is a discontinued pattern for a very accurate mid-19th century dress.
Did it look like the photo/drawing on the pattern envelope once you were done sewing with it?
Not really, but only because of my modifications.
Were the instructions easy to follow?
No. I ended up taking advise from other historical reenactors who have made the dress, and just put it together in the typical way of the period. The diagrams in the instructions helped a bit.
What did you particularly like or dislike about the pattern?
This pattern helped me to become familiar with the shapes from the period. I was new to reenacting and recreating historical fashions, so it helped me feel ok about diving into new territory.
Fabric Used:
Cotton fabric from SAS
Pattern alterations or any design changes you made:
Created a yoke with gathers, added ruffled sleeve caps, reduced fullness in the sleeve. I drastically adjusted the fit, basically just pinning out the extra fullness to create a fitted bodice, then adding fullness back in where I wanted it.
Would you sew it again? Would you recommend it to others?
I would not sew it again- every dress I’ve made since for this historical time period I now create from scratch. I wouldn’t particularly recommend this pattern because of you have enough expertise to make do with it, you could probably make do without it! However, if you’re a good seamstress who just isn’t familiar with the period, this is a decent pattern.
Conclusion:
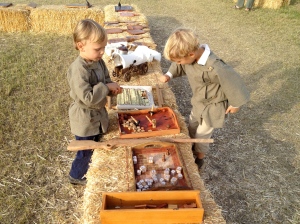
I was very excited to make my first dress for historical reenacting and this sent me on a journey that has led to two more outfits for me, one of which received honorable mention at the state level Make It With Wool competition, as well as four dresses for others and three boys outfits! So even though I don’t love the pattern, it has a special place in my sewing room


